
Welcome to The Recipe Corner, your new go-to spot for simple, delicious, and stress –free goodies straight from my kitchen to your phone screen. If you have fallen face first into this ice land of confectionary appreciation, then you may as well stay and learn how to make Coconut Cream Cake.
My sweet mother-in-law Ms. Jane recently had a birthday, and she never really asks for much. She always wants a cake of her choosing as her present from us, so I’m always happy to oblige her.
Usually, she goes for lemon flavored something or the other, but this time around, she asked for coconut.
I have a semi-homemade recipe in my arsenal, so this holiday season I’ve decided to share it with all of you, just in case you have a special family member who loves coconut as much as Ms. Jane does.
Don’t get me wrong, when I say semi-homemade, I’m greatly referring to the prefabricated boxed cake mix. The rest of the recipe takes a little time and patience, but it’s well worth it for the end result.
Let’s get to the fun stuff!
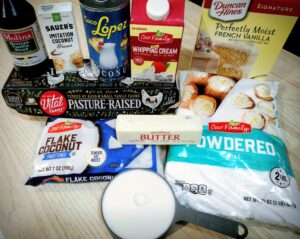 For the cake, you’re going to need one box of Duncan Hines French Vanilla cake mix, one cup of milk, one stick of melted butter, three eggs, and one teaspoon of coconut extract.
For the whipped frosting, you’re going to need one cup of full fat cream of coconut, one cup of cold heavy whipping cream, a half of a teaspoon of vanilla extract, a cup of flaked coconut, and a half of a cup of powdered sugar.
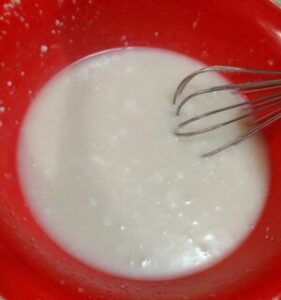
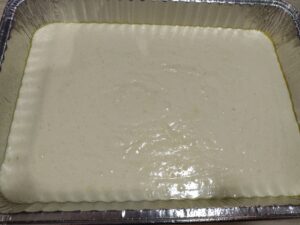 Start by preheating your oven to 350 degrees. In a bowl, whisk together the cake mix, milk, coconut extract, melted butter, and your three eggs until well combined. Spray a cake pan with non-stick cooking spray, evenly pour in your batter, and put it in the oven.
Bake the cake for 20-30 minutes until golden brown. You can insert a wooden toothpick in the middle of the cake, and if it comes out clean, it’s done. If not, pop it back into the oven for five-minute increments until it’s finished.
Once it’s out of the oven, let the cake cool completely before you begin making the frosting. If you try to put the cold ingredients from the frosting onto a still warm cake, you’ll just end up with a soggy mess that looks like you dropped a loaf of bread into a sink full of dishwater.
Trust me on this one!
 Before starting the frosting, open the can of cream of coconut and spoon all the contents into a mixing bowl. You’ll notice that the fat has separated from the coconut syrup, but that’s ok because we are going to fix it.
Use a handheld mixer on low or a metal whisk and stir the contents back together until it’s once again smooth and creamy. Pour one cup of cream into a small bowl and set it aside.
*At this point, you can toss the remainder of the coconut cream out, or you can put it in a Ziploc and freeze it. Just be sure to thaw it out and whisk it together when you’re ready to use it again. *
Pour one cup of heavy whipping cream into a medium sized bowl and use your handheld mixer on high to beat the cream until stiff peaks begin to form.
*Stop the process once you see this happen. If you fluff it too long, you’ll end up with homemade butter. *
Not a bad thing at all, (I’ve been known to throw together some butter with leftover whipping cream), but that’s not what we want for this cake.
*You all be sure to remind me to put up my butter recipe at a later date. I’ve had some curiosity from other folks about that particular task. *
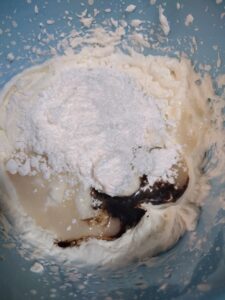 Add in half the cup of coconut cream to your whipped cream mixture a teaspoon at the time, beating 15 seconds between each addition. Next, mix in the vanilla and your powdered sugar.
Everyone is different, and some coconut cream is sweeter than others, so if your frosting doesn’t taste quite coconutty enough for you, then add in more in the same manner as before. You can also just add in half a teaspoon of coconut extract.
 Once you have everything blended to your liking, fold in the cup of flaked coconut, and spread it on top of your cooled cake.
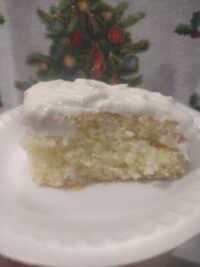
 I usually let my Coconut Cream Cake chill overnight in the fridge and then serve it the next day. It allows time for all the flavors to mesh together and for the frosting to finish setting up.
Overall, the prep time for this recipe was about 20 minutes for both the cake and the frosting, but the bake time and cooling time set me back about two hours. Not too shabby at all, but I would definitely suggest making this the day before you plan to serve it.
Keep your apron close and your oven closer, and be sure to check back in at The Recipe Corner each week. There’s bound to be something here that will have your kitchen smelling amazing, and the mama in you smacking hands away from a plate. Stay tuned for more holiday goodies that will have those sleighbells ringing as we continue to fa-la-la all the way to Santa’s arrival.