Welcome to The Recipe Corner, your new go-to spot for simple, delicious, and stress –free goodies straight from my kitchen to your phone screen. I have always loved creating tasty meals and baking sweet treats from recipes passed down from generations of women in my family. My oldest son has begged me to compile them all for him in one spot, so he is getting that request granted starting off with one of his favorite cookies.
With school starting back, and everyone having such busy schedules, it’s nice to come home to a homemade snack in the afternoon. These four ingredient peanut butter cookies take absolutely no time at all to throw together, and most of the items you need are already in your pantry or your refrigerator.
Now, keep in mind that everyone does things a little differently, and that is perfectly okay. I’m sharing the recipe that I use, and I hope that this inspires you to share the food that you love with other folks.
Let’s get to the good stuff!
Preheat your oven to 325 degrees. No two ovens are exactly the same, and we want to bake these low and slow. Line two baking sheets with parchment paper and set them aside.
I promise those paper-lined pans will be the best thing that ever happened to you when you take those babies out of the oven. Don’t miss this step!
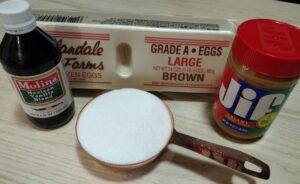 You will need one egg, one cup of smooth peanut butter, one cup of granulated sugar, and one teaspoon of vanilla. If you like a little adventure in your life, you can also use crunchy peanut butter.
Combine all of your ingredients in a large bowl using a hand mixer. If you don’t have a mixer, you can go old school and use a fork. It may take you a little bit longer to get everything together, but it works. Magicians have tricks of the trade.
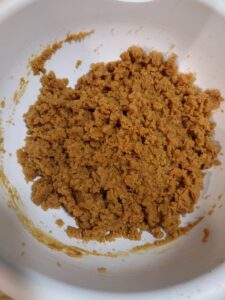 The mixture should have a crumbly consistency and should roll easily into a ball without sticking to your fingers. For sticky dough, add more sugar a teaspoon at the time, and for dry dough that won’t come together, add more peanut butter in the same manner.
Here comes the fun part.
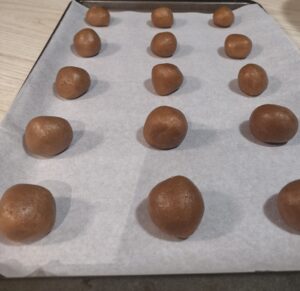 Grab your baking sheets and sit them next to your bowl. Pinch a one-inch portion of your dough between your thumb, index, and middle fingers. Roll the dough into a ball and place it on your baking sheet. Repeat the process with the rest of the dough, placing each cookie two inches apart. I ended up with 12 on each baking pan, and I had 24 cookies total.
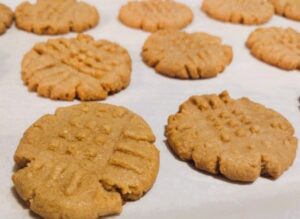
You know how peanut butter cookies have that cute little design in the middle? It’s not hard at all to achieve. Surprisingly, all you need is a fork. The longer the tines, the better.
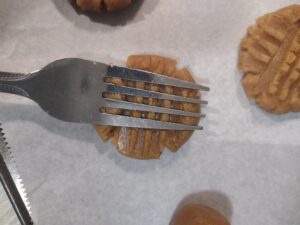 Start first by gently pressing your fork bottom side down into the cookie ball. Lift up and then press down again in the opposite direction to make a grid-like print. Not only does this make your pattern, but it also flattens out your cookies. Repeat the process until all of them are all prettied up and ready to go into the oven.
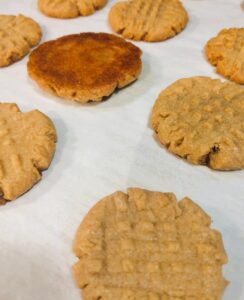
Slide your baking sheets into your preheated oven and let them bake about 10-12 minutes or until the sides are just turning golden brown.
Do you remember how I told you that your parchment paper would be your best friend? Well, you have now reached that point in the relationship where it’s really going to help you out.
When the cookies have finished baking, take them out of the oven. Grab the end of your parchment paper, slightly angle your pan almost level with your counter, and pull the paper with the cookies attached onto the surface.
You now have fresh baked peanut butter confection cooling in your kitchen. I know you’ll be absolutely tempted to grab a glass of cold milk and let the consumption begin, but I can’t stress enough how important it is to let those puppies cool off and firm up.
 A warm cookie will fall apart, and you won’t get to enjoy the reward of biting into that chewy center and crunchy outside. The texture is a peanut butter cookie’s signature move that’s probably won it at least an Olympic gold medal and a book deal.
If said cookies still exist by the time the kids make it home from school, throw the leftovers in a Ziploc bag or Tupperware container. They will keep just fine on the counter for about 3 to 5 days.
In total, you may only have about an hour invested in your prep and baking time. There’s no big mess or a bunch of dishes to wash at the end of it, and these can be thrown together while you have supper simmering on the stove.
Have your apron handy, and be sure to check back in at The Recipe Corner each week. There’s bound to be something here that will have your kitchen smelling amazing, and the mama in you smacking hands away from a plate. See you soon!