

How to Tape a Knee for Stability
Proper knee taping provides essential stability for athletes and individuals recovering from injuries. The technique requires specific materials and methodical application to be effective. Athletic trainers emphasize correct tension and positioning to support the joint without restricting circulation. When executed correctly, taping can prevent further damage and facilitate healing. However, improper application may lead to complications or inadequate support. The following instructions outline the precise methodology necessary for ideal knee stabilization.
Essential Supplies for Knee Taping
Preparation of appropriate materials guarantees effective taping a knee for stability. Athletic tape (1.5-inch width) serves as the primary adhesive, while pre-wrap foam provides skin protection. Adhesive spray enhances tape adherence for active individuals
Scissors with blunt tips allow safe cutting during application and removal. Skin cleanser removes oils that compromise adhesion. Tape underwrap prevents skin irritation in sensitive areas.
For professional application, include elastic tape for flexible support and rigid tape for maximum stabilization. Anchor strips secure the entire structure. Store supplies in a waterproof container to maintain adhesive quality and extend shelf life.
Understanding Different Knee Taping Techniques
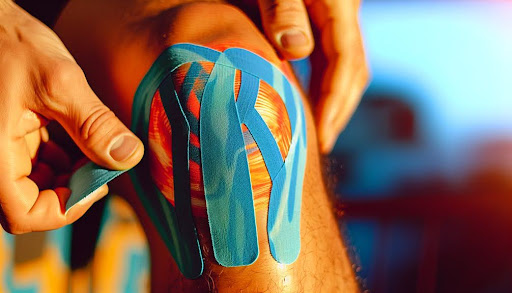
Various knee taping methods exist to address specific stability issues and injury types. The McConnell technique focuses on patellofemoral alignment using rigid tape to correct patellar tracking. Kinesiology taping employs elastic tape that supports muscles while allowing movement, ideal for rehabilitation phases.
For medial/lateral instability, the basket weave technique creates crosshatched support with non-elastic tape. The spiral method encircles the knee in overlapping strips to provide circumferential stability without restricting flexion.
Athletic trainers often utilize combination approaches, tailoring techniques to specific diagnoses. Proper application requires understanding anatomical structures and biomechanical principles to effectively support injured tissues.

Step-by-Step Guide to Basic Knee Support Taping
The fundamental knee stability taping procedure combines elements from several techniques into a practical, accessible method suitable for common support needs.
Begin with clean, dry skin and rounded knee position at 30° flexion. Apply pre-tape adhesive spray to prevent irritation. Anchor strips extend 2-3 inches above and below the knee joint. Apply I-strips vertically across the patella from superior to inferior positions. Follow with horizontal strips for medial/lateral support, overlapping by 50%.
Complete with spiral strips from medial to lateral aspects, creating compression without restricting circulation. Check for proper tension by having the patient perform gentle knee movement tests.
Advanced Taping Methods for Specific Knee Conditions
Different knee pathologies require specialized taping approaches beyond basic supportive techniques. For patellofemoral pain syndrome, McConnell taping utilizes medial glide techniques to correct patellar tracking. Apply rigid tape from lateral patella, pulling medially with appropriate tension.
ACL injuries benefit from spiral taping methods that limit tibial rotation. Start below knee, wrap diagonally across joint line, and secure above knee on opposite side.
For meniscal injuries, implement compartmental unloading techniques. Apply anchor strips around thigh and calf, then add Y-strips directing force away from the affected compartment.
Iliotibial band syndrome requires lateral stabilization with kinesiology tape applied in reduced tension from mid-thigh to tibial insertion.
Post-Taping Care and Maintenance
Once properly applied, knee taping requires consistent maintenance to guarantee therapeutic effectiveness and prevent skin complications.
Patients should monitor the tape regularly for loosening, bunching, or adhesive failure. Replace tape if edges curl or adhesion diminishes. Remove tape after 24-48 hours or per clinician’s instructions to prevent skin irritation. Prior to removal, moisten the tape with warm water to minimize discomfort and residue.
Between applications, cleanse the skin thoroughly with mild soap, allowing complete drying before reapplication. Address any skin reactions promptly by discontinuing use and consulting a healthcare provider. Store unused tape in a cool, dry environment to preserve adhesive properties.
(Provided Post)